Tuesday, July 29, 2014

Bella Blvd Christmas Countdown Flip Book


Well, it is that time of the year that Christmas and Christmas Scrapbooking thoughts start dancing in my head! At the LSS, we are placing orders for the new Holiday lines and putting older Holiday lines on sale. Last weekend, as I was looking at product left in the store from 2013, the Bella Blvd Christmas Countdown papers called out to me. So, of course, I answered the call. :) 


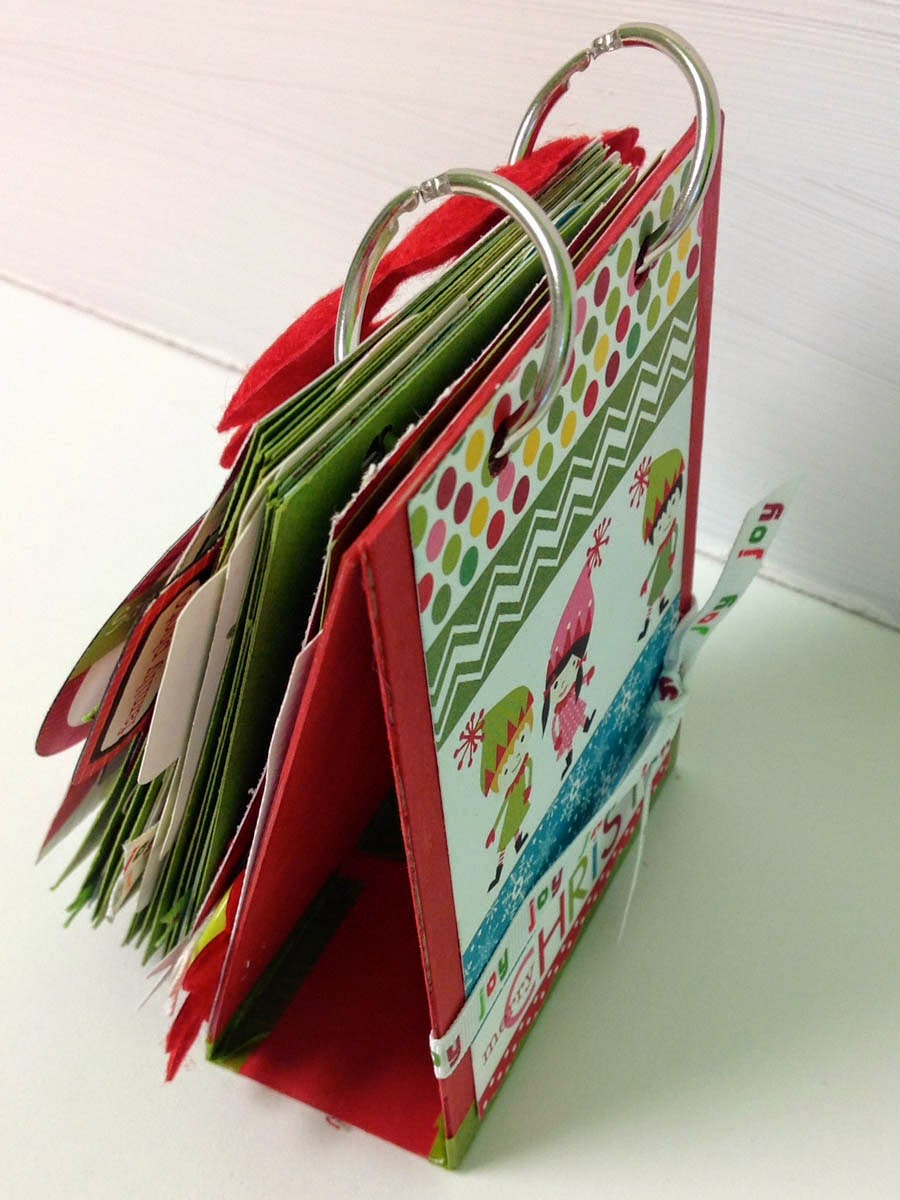
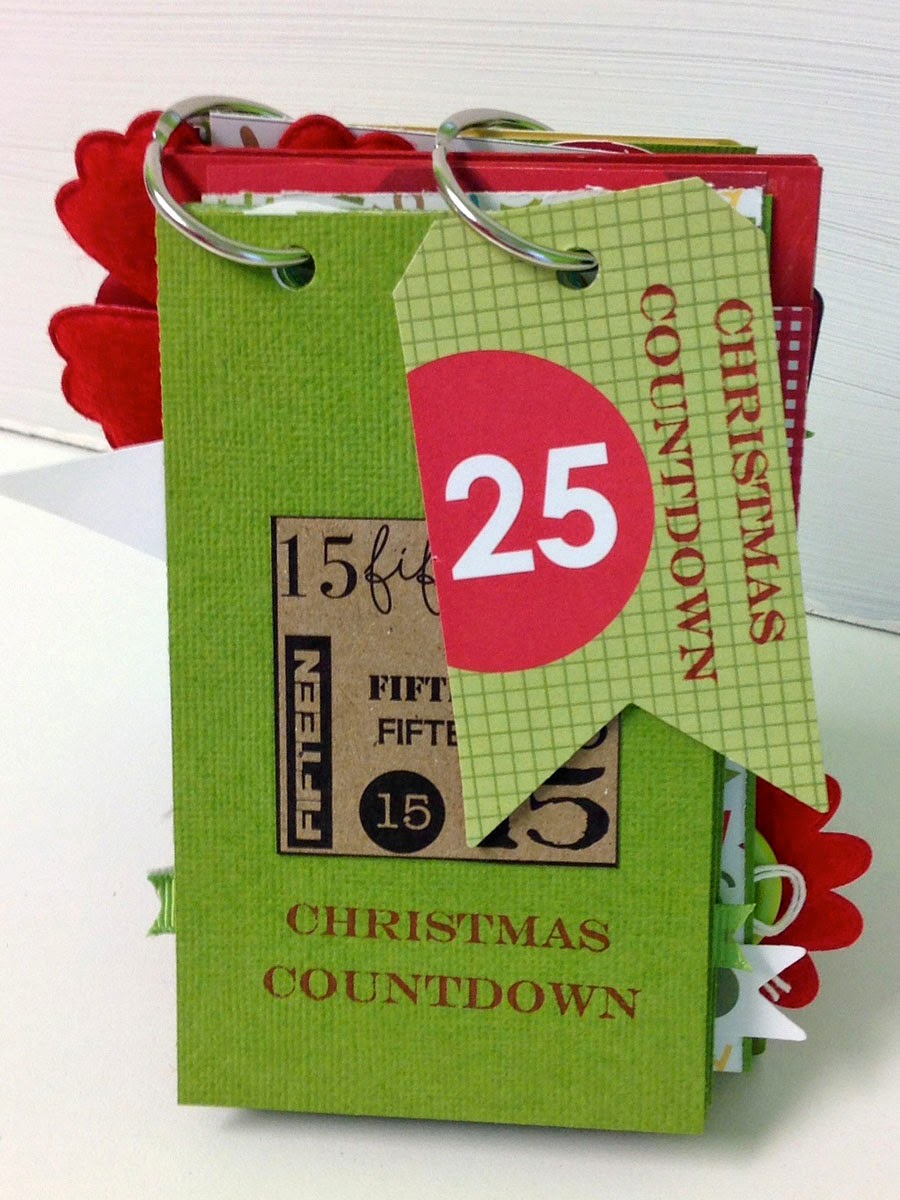
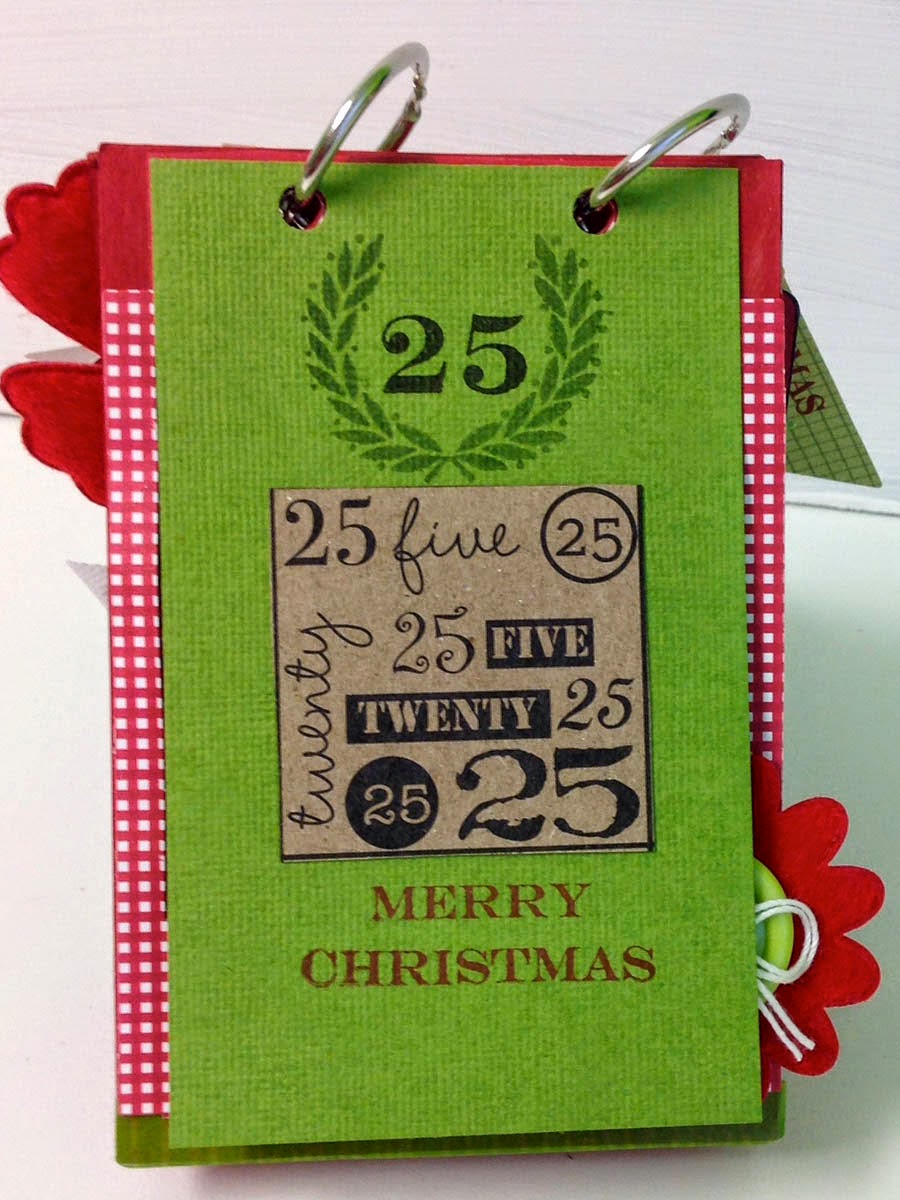
I pulled some of the remaining product and created a little flip up mini book. I love creating these types of books. This one will be a Christmas Countdown flip up book. The inspiration for this book came strictly from the name of the paper line (Christmas Countdown).


For the stand, I went with chipboard. I cut the chipboard into a 3.5 inch width. The chipboard is just about 13 inches long but because I bend it into an "U" shape, it will stand about 5.5 inches tall. The stand has a base with the two sides. I do slightly cut the chipboard to get it to fold at the bottom. I use washi tape to cover the cuts. The washi tape keeps the book back and front from falling apart from the base over time. I painted the chipboard red.


All the pages in the book are 3x5 inches. Small enough to hold a 3x3 photo, or to write favorite christmas memories, or quotes, or just use as a countdown. The kraft number blocks came from an old 2011 Canvas Corp number paper I pulled from the 50% bin. (I love the 50% bins!)


I am happy with this little book and hope it inspires others to go create!  Thanks for stopping in for a look at this little Christmas Countdown book!

~Tisha

Monday, July 28, 2014

Teresa Collins-Something Wonderful Layout


I am playing with my new papers from the Something Wonderful Teresa Collins line. I love the crisp feel to this line. Sometimes I can't get enough of the vintage mood of papers and then other times, I want sharpness. Funny how that goes.


I wanted to do a layout with the photo smack dab in the center with very few embellishment. I wanted to use  the color black as a high contrast element. The photo is pop dotted over the vellum. The vellum is embossed with the Teresa Collins triangle embossing folder. The title of the layout is "love & life" and is low key in comparison to some of my typical layouts. I contemplated adding some black ink sprinkles or outlining some more triangles on the background paper, but decided against it. I wanted to keep the layout crisp.


I am not happy with my black journal label. If I was a perfectionist, I would pull the main center up and re-stick to another background sheet. Well, I lie. I did not do this because I did not have another sheet of the triangle paper. I originally had written my sentiments directly on the paper and just did not like my writing. So I covered it up with a chalk label and washi tape. I don't like how heavy that part of the layout became. But it will live this way as I am moving on. :) 


Supplies Used
Teresa Collins Something Wonderful Papers and Memorabilia chipboard and stickers
Maggie Holmes fabric frame
Fancy Pants Chalk label
Generic plain vellum embossed with triangles from Teresa Collins embossing folder

Happy Monday! ~Tisha


Friday, July 25, 2014

Old School and October Afternoon Layout


Truly excited to return to my hobby room. Today is a share of old school tool and embellies combined with new supplies and new tools. I did a drastic clearing of my hobby room last December, but I did keep some older supplies and tools that I use. This would include my old Making Memories metal elements. Oh, I remember when the Metal Trend was hot hot!!! And yes, I bought, bought! ;P And I still have lots of the metal elements from Making Memories. I just love them still!


I crossed my OA Daily Flash with a pinch of EP Capture and a dab of TC Something Wonderful for this layout. I use my homemade heart stencil to add some Viva Ferro silver paste (New Tools). 


Then I pounded some circle metal brads from my old MM metal stash for the year and word "dad".


I called this page done even though it does not have a stand out element that says, "I am the title!" I felt between the journal and photo, it did not need a designated "Title". I am cool with it.


Supplies Used:
October Afternoon paper, flair, chipboard hearts, and enamel dots
Echo Park Capture Life stickers and Sprinkled with Love Paper
Teresa Collins Something Wonderful Paper, sequins and brad
Viva Ferro Paste
Glitz Camera doodle roller and feather stamp
Making Memories Metal Alpha & Number Brads


Thanks for stopping in! ~Tisha

Thursday, July 17, 2014

Pickle Jar Make Over!

What a little busy week it has been here and my hobby room feels so abandoned. I have been pulled away too many nights with outside "life" stuff.  But never fear, I had a reunion with my hobby room last night and we transformed an old commercial size pickle jar (leftover stuff from sis's wedding). It has been holding ribbons up to it's make over night.

We are preparing for our big event at the LSS I work at and I thought this huge pickle jar would be great to hold some tall stem flowers or fru fru for our guest's table. I also thought I should play with some gold paint as our guest loves gold. Why not!

I did not get any before pictures as I really did not have faith this would work. I used Krylon gold spray paint. The can said it would work on glass. I used some old washi tape to tape off some stripes on the jar and then taped off the top so no sprays would go on the inside.

Sooo, it turned out OK for my first go with spray paint and glass jars. 

Lessons learned: Be patient and wait for it to dry! Be observant and actually pay attention to how close you are spraying to the jar! Don't tape stripes over the curve of the top of the jar! Gold Sharpie pen actually helped a couple of boo-boo areas!


I also sprayed an Dollar Tree silver serving tray while I was going after the pickle jar.


I hot glued some natural fiber ribbon around the threaded top area. Inside I made a tube with some scrap paper to sit on the inside as an option.


This is the jar with nothing inside.  You can see the top area is jagged where I taped off on the curve of the jar.  But I think it turned out ok for a first go. Now I will see how it holds up just sitting around on the table, if it scratches and peels.

Thanks for stopping by and saying hello to me and this Pickle Jar! :)  Tisha


Wednesday, July 9, 2014

Feed Your Craft Forum Challenge

This is my layout entry for the "Goodbye Two Peas" challenge at Feed Your Craft Forum. Link to Feed Your Craft Forum  There were three choices for the challenge. I went with the second option, to scrapbook a layout about scrapbooking.

I was excited but also sad that just when I thought about what I would do for the challenge, I received in the mail my last Two Peas in a Bucket order. So it seemed that I should use the photos I took of my last order for my layout response to the goodbye challenge posted at the forum.


I originally thought I would put my journaling on a tag when I started scrapping, but then when I had my page laid out the way I wanted, the journaling just did not have anywhere to go on the layout and I absolutely needed the journaling to complete this kind of layout. So I thought I would add a second page, a 6x12 page. And I liked it!

The first page is 12x12 and the second page is 6x12. I plan to add to the back of the 6x12 my last order invoice from Two Peas. I will just fold it and slide behind the page. I had ordered some Thickers and it will be interesting in the coming years to look back at the itemized order to see the names of the Thickers and prices.


Here is where a boo boo happened but then became part of the embellishment. When I was trying to decide where to add the sticker "I will always remember", I accidentally let it touch my title. When I pulled it off, the sticker pulled some of the teal off the title letters. So, I just decided to leave it. I will say  the title is distressed. 

I will also note that I used part of the brown bag my order came in under the main cluster on page one and then I also used the "Two Peas" circle sticker that was on the bag.


Supplies Used:
Teresa Collins Urban Market Papers
Scenic Route Craft Paper
Maggie Holmes Styleboard Papers & Die Cuts
American Crafts Thickers
Jillibean Soup Sprinkles
Teresa Collins Brads & Enamel Dots
Studio Calico Chipboard Hearts
Evalicious Flair
Two Peas Arrow Paperclips
Maya Road Heart StickPen


Thanks for stopping by. ~ Tisha

Tuesday, July 8, 2014

Lovely October Afternoon


I am so happy to use some of the new to me Daily Flash papers for a cute photo of us girls with Dad. This page will go in my album of my youngest sister's wedding. I am just scrapping photos from the wedding as I am in the mood to do so. 


I truly love the square cards from the sheet of paper. I am thinking I need to buy some of the page protectors for the 4x4 cards to add to my pocket scrapping. I fussy cutted the camera off one card and pop dotted it over the yellow. 


The title for this page is small and low key. I like doing this on occasion when it just feels right. I did not want a lot of embellishing as I love the subway art paper and wanted it to speak on the page.

My really exciting moment was using the camera paperclip above the title. Simply because I bought a pack of these paperclips and can not ever seem to really get them to look right on a page. So it was a big moment when I got that paperclip to look cute sitting up there in the corner! Yes!


Supplies Used:
October Afternoon Daily Flash Papers, Tins, and Chipboard
Teresa Collins Tags,Button, Brad and Stickers
Evalicious Paperclip Camera
Cosmo Cricket Vellum
Generic White Paper

Happy Tuesday! ~Tisha

Thursday, July 3, 2014

Card Share & Happy Independence Day!


So far, it seems like everyone is a little in disbelief that July is here. I am also in disbelief. We have been enjoying cooler weather and rain here in our little bubble. So I am treasuring being able to crack the window a bit to hear the rain when I get to play in my hobby room in the evenings! I just finished some cards to mail out this July and thought I would share.  I was happy I used scraps for these cards. Oh, how lovely it feels to use those scraps! 


I used some Amy Tangerine Plus One scraps and my new found love of bows.


I also used some scraps I had with gold stuff. I created the large gold heart by rubbing Viva Inka Gold over an OLD (did I say OLD) Cosmo Cricket chipboard shape. I am pretty sure I get a "gold" star for that one.


Thanks for stopping by!  Enjoy the start of July!!! ~ Tisha