Sunday, June 29, 2014

The Scrap System

I am so happy that I will have some time to play in my hobby room this coming week. I have a clean slate to start working on some scrappy something.  It is fun to know I get to "start" something!

Today I will share what my scrap system is. My scrappy system is new to me. Last December, I totally pulled all my scrap stuff out of my hobby room. My hobby room was a disaster! I had piles of stuff everywhere and I am not a clutter person. It was just life being too much! I had stuff in piles from my LSS job and then stuff from my stash and then stuff that seems to find it's way into my hobby room even though it does not belong in here. I hated being in my hobby room and felt claustrophobic. So what's a scrap gal to do. I 100% redid my room. The only thing that is the same is my wall paint and my craft table. I even redid how I scrap and play, my system. I'll share that today.

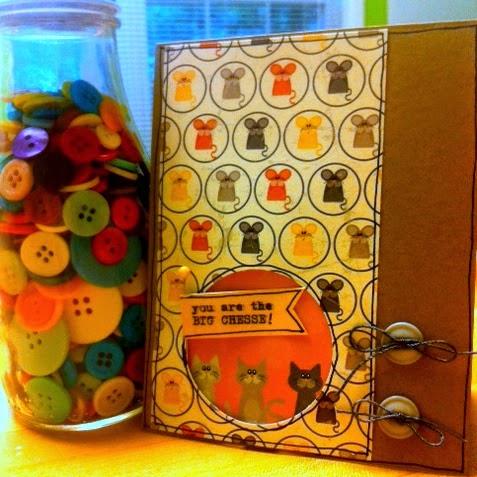
So, new system.  I have always stored my papers by company and embellies by type. That has not changed. However, I have changed what I will scrap with on my current work. As of December, I leave my stack of papers sitting out on my desk and my little tray of coordinating embellies also out. I did not invest in a pretty bamboo tray or embellie container until I knew I would enjoy working this way. I bought both the bamboo tray and clear container in April. It was my reward.


My bamboo tray neatly holds all my recent paper collections. I just layer them on top of one another. I have refilled my stack of paper once since December.  I just recently added a new Teresa Collins line-Urban Market.


What I LOVE about working with this system is... 
1. it keeps me in check of buying habits (my LSS part time job can quickly overwhelm me with new product) 
2. I can quickly start scrapping because my paper is "right here"(No digging through a large stash trying to find something that inspires me or is the colors I want).
3. I can quickly pull embellishments to go with my project because they are also "right here". 


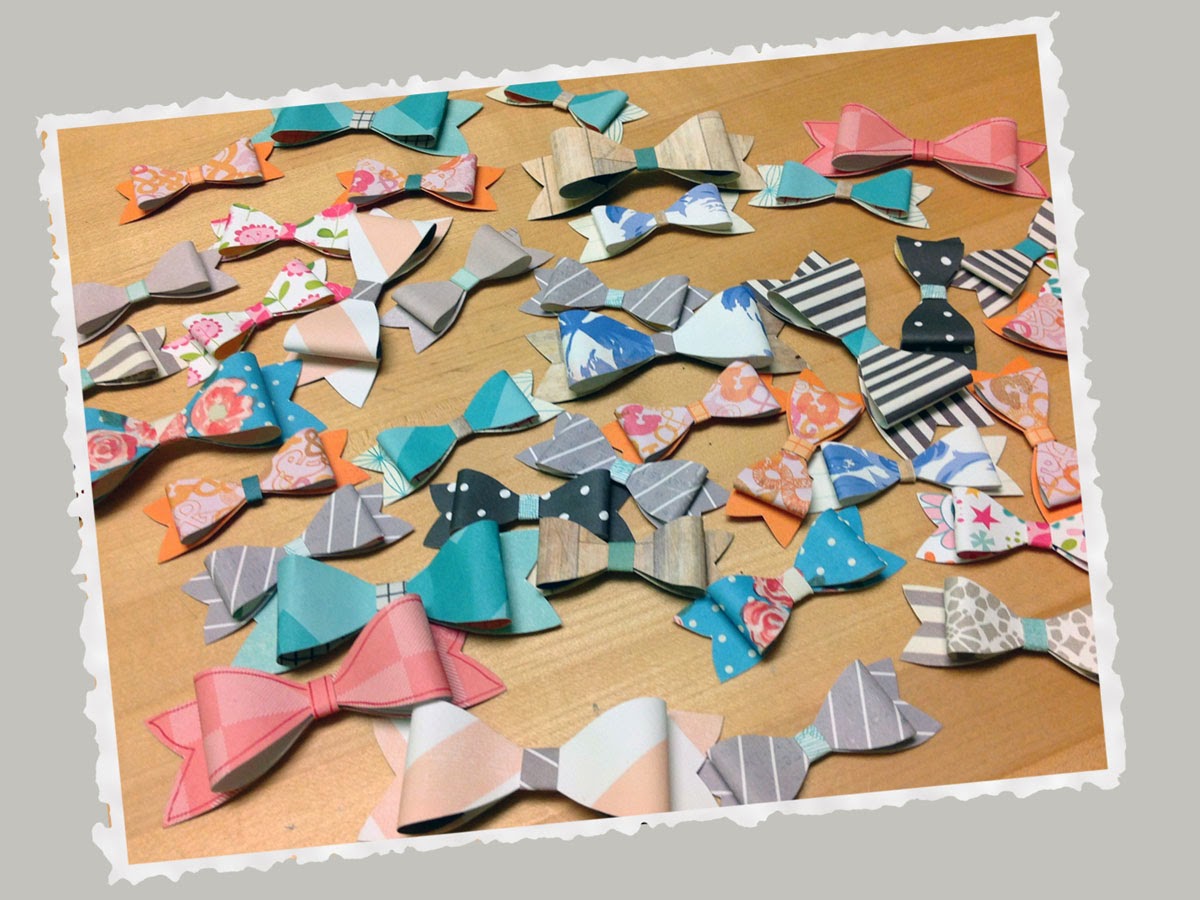
My embellies are stored in a clear tray with 3 compartments. I have restocked this container once, as well, since December. I love being able to see what fun things I have to use and keep it neatly contained. I keep the bumpy stuff (brads and such) in the first compartment, tags, doilies, stickers in the second compartment and diecuts in the third compartment. 


I do store all my larger stickers and alphas in my usual area in my stash, but it is easy to just pull that when I need to do so.

Yes. I do have a stash. But No, it has not grown since December. I am actually using my papers and embellies!  I am finding it hard to believe this system is working for me. But I have said "no" to several new releases because I can see by my tray, that I have a good supply of product to work from! 

When I have used up all I can from a paper collection and embellishments, I will move it to my stash storage. It is very small amount so far that has gone into my stash. I am totally digging my new system. I can't believe I didn't start this sooner!

Here is wishing you a great week to start a new scrappy something! ~Tisha

Sunday, June 22, 2014

All About Bows

There has not been any time this last week or this coming week for adventures or the like in my craft room. It is busy "day job" time and busy "after 5:00 job" time here. So not much time to be creative for myself.

However, I have found myself playing with my paper scraps when I can grab a couple minutes here and there. I am fascinated with this bow template I found via KSimone's  Inspired Me Blog which she got from howaboutorange blog


Oh my goodness! It is so much fun! I printed it off and shrunk it down to 50% and 35% to make small bows. It is the small things that entertain me sometimes, well ALOT of the time! 


Hope you can find some small things to bring smiles your way this week.

Happy Week To You, ~ Tisha

Monday, June 16, 2014

Maggie Holmes Layout Share

It is all about using up some Maggie Holmes scrap papers in the craft room! Here is a layout using some scraps from the Flea Market and Maggie Lines. I am so resisting the urge to go stockpile some of the wood plank paper. I so love it. I may just grab a couple pieces of it. :) But to the layout. I am using gold on this layout as accent. Getting alot of use out of my gold! The large aqua piece is from the Carta Bella Wildflower collection. You could call this a piecemeal layout. :)


It is also fun to note that the tiny blue tile alphas are from a 2004 sticker sheet, Yes!! The date is on the price sticker on the back. :) Extra special when I get to use some old stash!


I used a Faber-Castell Pitt metallic gold pen to outline paper pieces/elements and Elmers Opaque white paint pen to outline around photos. Some of my favorite techniques. 


Supplies Used:
Maggie Holmes Papers, diecut elements, overlays, vellum.
Dear Lizzy and Studio Calico papers
CartaBella paper
Glitz Design rhinestones and stickers
Teresa Collins stickers and enamel dots
WRMK Gold Alphabets and Two Busy Moms Alpha Stickers
Heidi Swap Gold Mist

Thanks for popping by! ~ Tisha

Tuesday, June 10, 2014

Maggie Holmes-Styleboard Layout

I truly love Maggie Holmes paper lines and Styleboard did not disappoint! I don't think I will use most of the horse items, but there is plenty of other loveliness to work with in the line.  I decided to use Style board for a couple of snaps of hubby and I from one of our travels. 


For this layout, I played with some modeling paste and used my Heidi Swap floral stencil. I have not used this stencil yet as I just never seemed to "like" it, but yeah, I liked it on this layout. I mixed the plain ole modeling paste with some generic gray paint and some tinsel Color Shine mist. I also broke out the watercolor paint and added some teal tint over the page. It was fun!


I added the cork heart paper strips to top and bottom after the layout was completed since I must have cut some paper off the "love this" sheet. When I went to put it in my album, I noticed it was a shorty! So I improvised and added some strips. It turned out great. Happy accident!


Supplies Used:
Maggie Holmes Styleboard Papers, diecuts, & chipboard pieces
Fancy Pants Glassine Bag
WRMK gold heart vellum
American Crafts Glitter cardstock & Thickers
Jillibean Soup tile stickers
Studio Calico vellum stickers
MME washi tape
Generic gold brads & stick pin
Found gold button
Liquitex Modeling Paste
Heidi Swap Color Shine Mist & Stencil


Thanks for stopping by and letting me share a layout!
Tisha :)


Monday, June 9, 2014

Teresa Collins-Save The Date-Layout

The weekend was a quiet rainy weekend. I played in my craft room and thought I would create something from the Save The Date line. I have lots of photos from my sister's wedding to have fun with and decided to play with my scraps as I listened to the rain.

I used a light brown cardstock as the base and couple of pattern papers to layer. I angled the photos in a slight diagonal to shake things up a bit. I am happy with the results. This layout makes me smile when I see my beautiful sister at her wedding dress fitting. So glad I was there to snap the pics!

Supplies:
Teresa Collins-Save The Date pattern papers, die cuts, tags, & enamel dots
Maggie Holmes-gold tape labels, photo overlays, gold rub-ons, & resin flowers
Dear Lizzy-gold Thickers
Gold Ribbon and Doilies


Have a lovely day! ~ Tisha


Tuesday, June 3, 2014

Themed Papers Revival

My early days of scrapping were strictly themed paper crafting. If I wanted to do a wedding layout, I bought "wedding papers" and "wedding stickers", if I wanted to do a fishing layout, I bought "fishing papers" and "fishing stickers"... Even though I have changed my paper crafting styles from those early days 14 years ago, there is still something so alluring when you find some theme papers. I am still picking these items up here and there. Over my vacation leave, I did some "light" cleaning (aka, moved a basket from one location to another location) and found an old 6x6 Cat Themed paper pad. Oh how cute!! Of course, I had to play! So I created a cute card for my sister who has received a promotion in her company and I created a 8.5x11 layout for one of my fur babies.  Sharing my creations today. I had to snap photos with my phone as I could not wait to get better lighting set up since I wanted to mail out my card and it was close to our mail drop off time. So, here are my fun time creations!


I am sure I bought this paper pad with the intentions of creating a mini album about my two fur babies...


Pop-dotted the mouse paper over the cat paper. Just thought that was funny, seeing the cats peaking up over the punched out circle. My sister is a cat person and I think she will get a laugh out of this. 


Stuck the circle on the inside and added some journaling lines. 

And created a simple layout on my mr. kitty, who thinks he is "the Cheese".


Of course, he was busy watching squirrels and birds and had no comment about his new page.

Happy Tuesday, Have a wonderful day!  ~Tisha